
Creating a Gallery Wall with Thrift Items should be things you love, cherish and do not mind looking at every day.
Creating a Gallery Wall with Thrift Items Video

This past year, I been trying to get my home to be a place I desire and want to retreat too. A sanctuary is what a home should be surrounded by items and living things you love.
My procrastination has been extreme on trying to design and create a gorgeous gallery wall above my couch.
To avoid taking the plunge into actually putting up the gallery wall I have been researching and looking for inspiration in several places such magazines to feel somewhat productive.
Well, enough is enough! Now is the time, to create a gallery wall with my most treasured thrift items. Today, I will walk you through the steps on creating a gallery wall with my mistakes and successes.

Do not worry about what you should and should not put on your gallery wall it can be anything your heart desires.
A family photo, an heirloom or gorgeous oil painting can bring a style and personality to a space that will start a conversation or create an amazing focal point on any gallery wall.
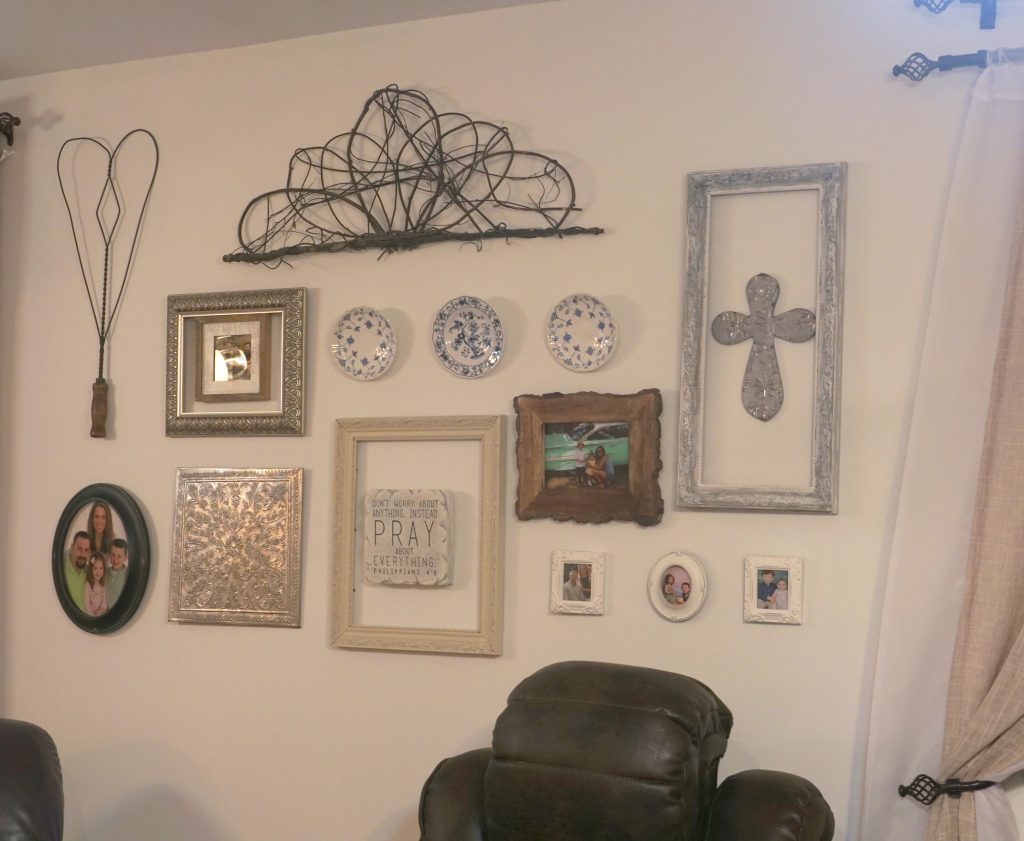
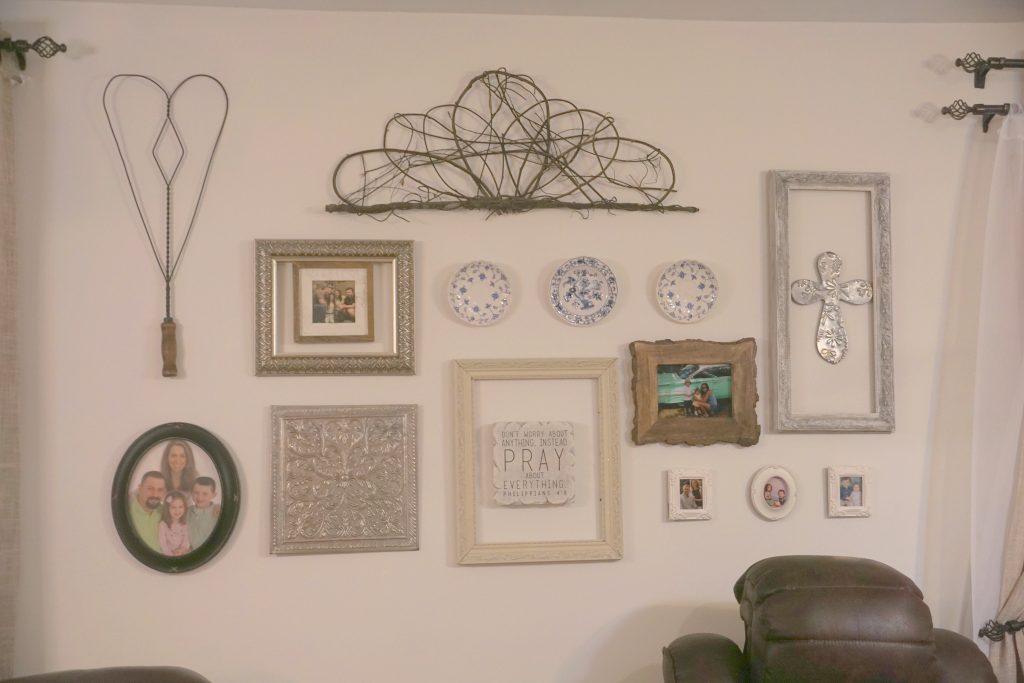
If there is a theme such as color or shape, a gallery wall with thrift items can be very cohesive and pretty. An example of a cohesive wall is a uniform color, shape, style or size. Try not to mix colors to many colors and stay in a particular style. I am working with blue and white and trying to stay in a classical look.
Tools Needed to Create a Gallery Wall

Butcher or Kraft Paper
Pencil
Scissors
Level
Ruler
Painter Tape
Hammer
Picture Hooks
Nails
Toggle Bolts (Optional)
Plate Hangers (Optional)
Planning and Lay Out of Creating a Gallery Wall with Thift Items
I do not know much about planning and laying out a gallery wall but, after hours of research there is a fool proof way to display items, you love with little mistakes.
Mistakes are not fun to fix and creating nail holes is not something I want to do. To avoid mistakes just use patience and planning.
Displaying a lay out of items on a gallery wall is not hard you just need to careful to plan on how to attempt it.
First, I took the items I wanted to display on my gallery wall and traced each one on kraft paper. Next, I cut out the outlines and label all your cut outs with the items I traced.

Second, mark your kraft paper where you would hang your items, cut out where the nail hole markings.
Thirdly, arrange your kraft paper cut outs on your wall by attaching edges with painter’s tape.
Do not be afraid to move and rearrange to achieve your desire layout. When you decide on the placement use a level to ensure everything is leveled. A ruler is helpful to space out all your gallery items.
Lastly, once you decide on your gallery wall with thrift items; hammer a small hanging nail in the holes on the kraft paper. Remover kraft paper and hang your thrifted items.
Creating a Gallery Wall with Thrift Item Ideas Behind the Couch
Before you put a single hole in the wall, planning ahead of time will help create a gallery wall with thrift items.
Decide what items you would like to place on your gallery wall behind the couch by arranging on a large table or floor.
Trace each gallery item out on butcher or kraft paper and then cut out.

Use painters’ tape and place desire design on wall. Move your paper cut outs till you have a layout that makes you happy!
Use a level against the paper to ensure the paper is nicely leveled on the wall before nailing in nails.
Know your wall, drywall or plaster. Different wall textures require certain hardware for hanging your gallery wall items. My walls are drywall and placement of my items is important. I am being mindful in hanging my light items on the drywall and heavier items. Heavy Items should be hung on the studs that are about sixteen inches apart or using toggles.

I am using picture hooks to hang lighter items and a nail for heavier items that is hammered into the stud.
Once leveled take your nail and hammer and nail where you would want your thrifted items hung.
Do not forget to make a spot on the butcher paper where the items are to be hung before placed on wall.
Living Room Gallery Wall with Thrift Items with What You Love
Creating a gallery wall with thrift items it should be things you will want to look at every day.
By carefully arranging and planning your gallery wall with thrifted items it should have style and personality. A gallery wall should be a showcase of who lives in the home.
Some items you may want to put on your gallery wall may not make it because it lacks interest of who lives in the home.
It is not that the thrifted items are not worth it but they need to be a reflection of who lives in the home. There should not be a fish on the wall if everyone in the home hates fish.
If there is an item, you want to add to the gallery wall try adding interest by changing the frame or color of the object before placing on gallery wall in your living room.
On my gallery wall there is arrangement of items including photos, ironstone plates, baskets, and vintage pieces.
Most people think hanging things on the wall it must be at eye level, this is not the case for creating a gallery wall.
Some items on your gallery wall maybe hung higher or lower than eye level to bring the eyes up and down the wall.
A gallery wall is a place within the home that is a piece of art that is appealing to all that visit.
Leave a Reply